Submitted by Melissa Stewart on October 21, 2013 - 11:34am
As you can no doubt imagine, most of the calls to our CADD Care Certified Helpdesk revolve around software installation. I have a few great tips regarding installation:
Installation Basics
Courtesy of Up & Ready
Below is a general Autodesk Product installation workflow:
- Login as an Administrator.
- Empty your TEMP folder. To open the TEMP folder, type %TEMP% in the address bar of Windows Explorer and hit Enter.
Note: If your product installation fails and you decide to open a Support Request with CADD/Autodesk Support, we would need to review install logs created in your TEMP folder during this product installation attempt.
- Disable your Antivirus software.
- Disable UAC: Windows 7 and Windows 8
- Install your product locally on your system from the installation media or browser download from Autodesk website.
Here at CADD we still recommend the browser download option. Sure, it may take a little longer to download and extract, but it’s a lot better than finding out not all of your files downloaded when you go to install! For more on the types of download available please see this blog post from Autodesk Support: http://upandready.typepad.com/up_and_ready/2013/01/quick-start-downloads.html
Installation Resources
Author: Melissa Stewart
 Melissa is a Technical Support Specialist at CADD Microsystems. You can reach her and our CADD Care Certified Helpdesk team by emailing support@caddmicrosystems.com, or calling (703) 924-5310 during regular business hours. Read more about Installing your Autodesk 2014 Products
Tags:
Installation
Submitted by Donnie Gladfelter on July 23, 2013 - 1:08pm
Among our favorite CAD/BIM Management features of the Autodesk Design Suites is the way one installation can take care of everything from AutoCAD to Revit and Navisworks. Although this makes it possible to get new users up-and-running faster than ever, uninstalling those applications was frequently a different story.
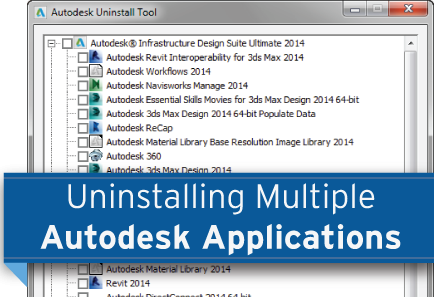
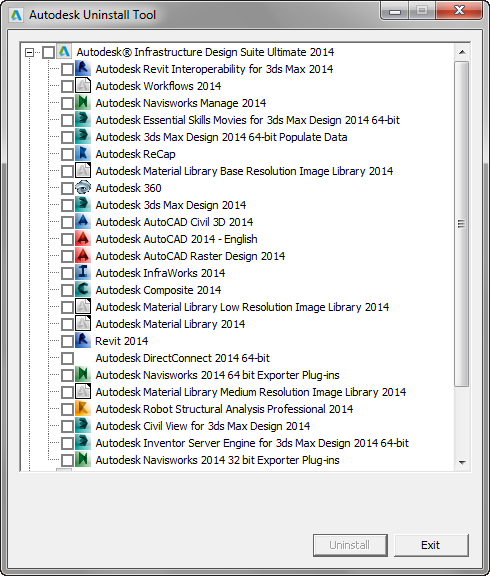
Autodesk's 2014 product line aims to change all of that with a new Quick Uninstall Utility. The Quick Uninstall Utility will allow you to uninstall one or all of your Autodesk applications at once even if those applications span multiple Design Suites or product lines. For example, Infrastructure Design Suite applications AutoCAD Civil 3D and AutoCAD Raster Design could be uninstalled alongside the Autodesk Vault Client even though the Autodesk Vault Client isn't part of the Infrastructure Design Suite.
To use the Quick Uninstall Utility:
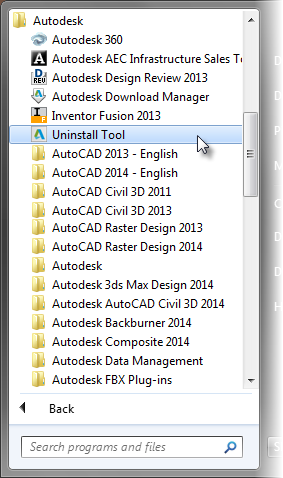
- Select Uninstall Tool by browsing to Start > All Programs > Autodesk.
- After launching the Autodesk Uninstall Tool, select the checkboxes next to the applications you would like to remove, and then click Uninstall.
It's important to note this tool will only uninstall the 2014 versions of your Autodesk applications. If you have the Autodesk Design Suite 2012 or AutoCAD Design Suite 2013, a similar uninstall tool is available for download from Autodesk's website:
Should you need additional help installing or uninstalling your Autodesk products, our Technical Support team is available Monday-Friday from 8:30 am - 4:30 pm EST. Visit our Technical Support page to contact one of our Technical Support Specialists, or to learn more about our Technical Support offerings. Read more about Uninstalling Multiple Autodesk Applications
Tags:
Autodesk 2014,
Installation,
Uninstall