Taking your designs into the field with Autodesk 360

The prevalence of smartphones and tablet devices among design professionals continues to grow, and for good reason. These devices are small, easy to carry into the field, offer all-day battery life, and provide a realtime link back to the office. Autodesk's cloud-computing platform named Autodesk 360 adds yet another benefit to these devices by letting design professionals take their designs with them.

Today Autodesk provides a family of mobile applications, purpose built for taking designs with you whenever, and wherever you need them. The portfolio of applications that interact with Autodesk 360 includes:

Autodesk 360 Mobile
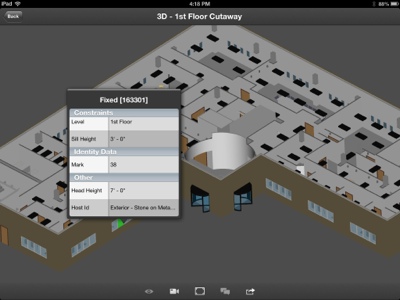
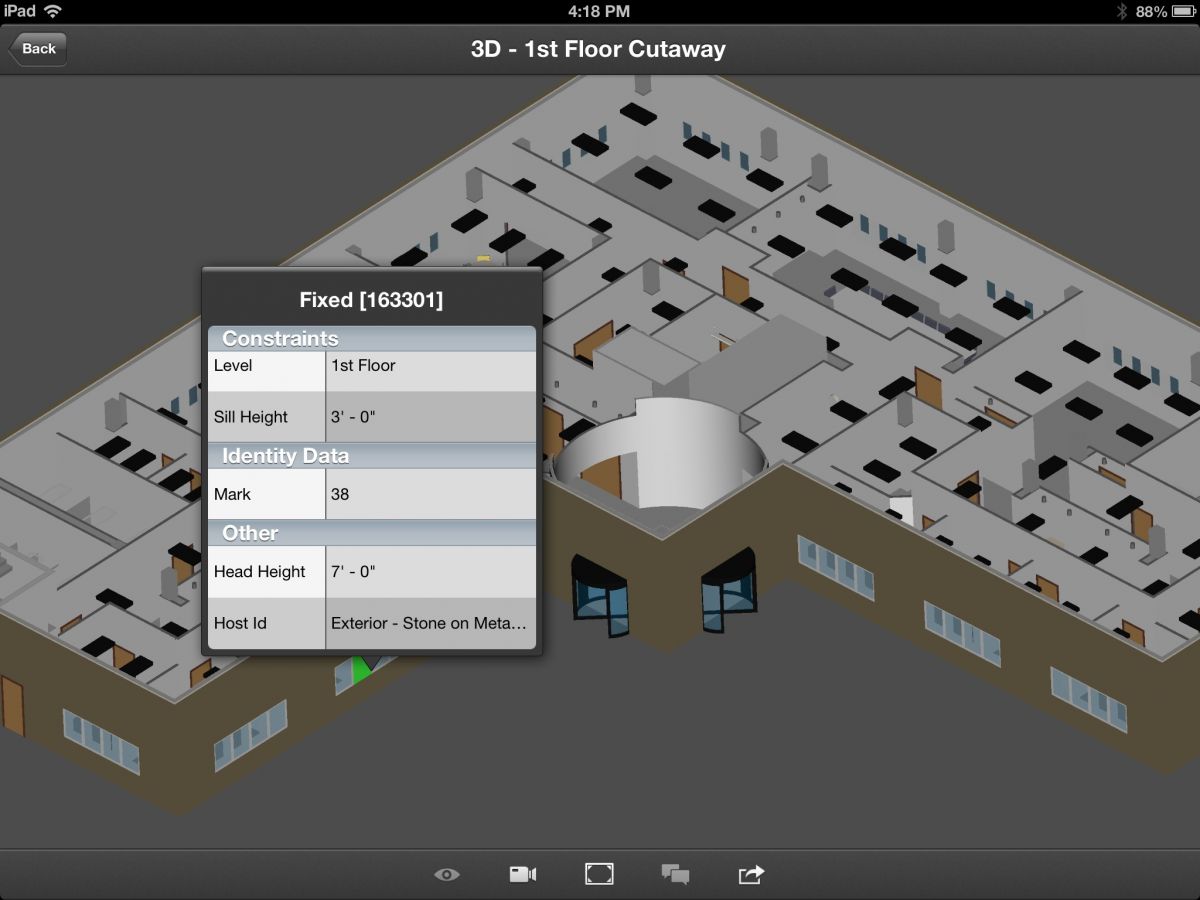
Autodesk 360 mobile app displaying a Revit model

Formerly known as Autodesk Design Review, the Autodesk 360 application provides the ability to open and view 2D and 3D DWG and DWF files in addition to both Revit and Navisworks files. The application uses familiar multi-touch gestures, allowing you to zoom, pan, and rotate your designs, while also providing access to meta data embedded in your designs (including Revit parameters).

Download:

AutoCAD WS
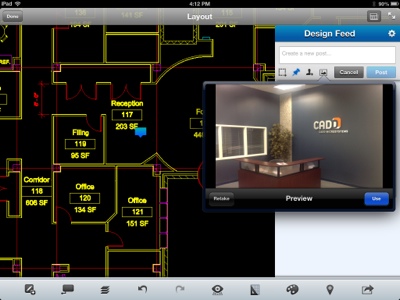
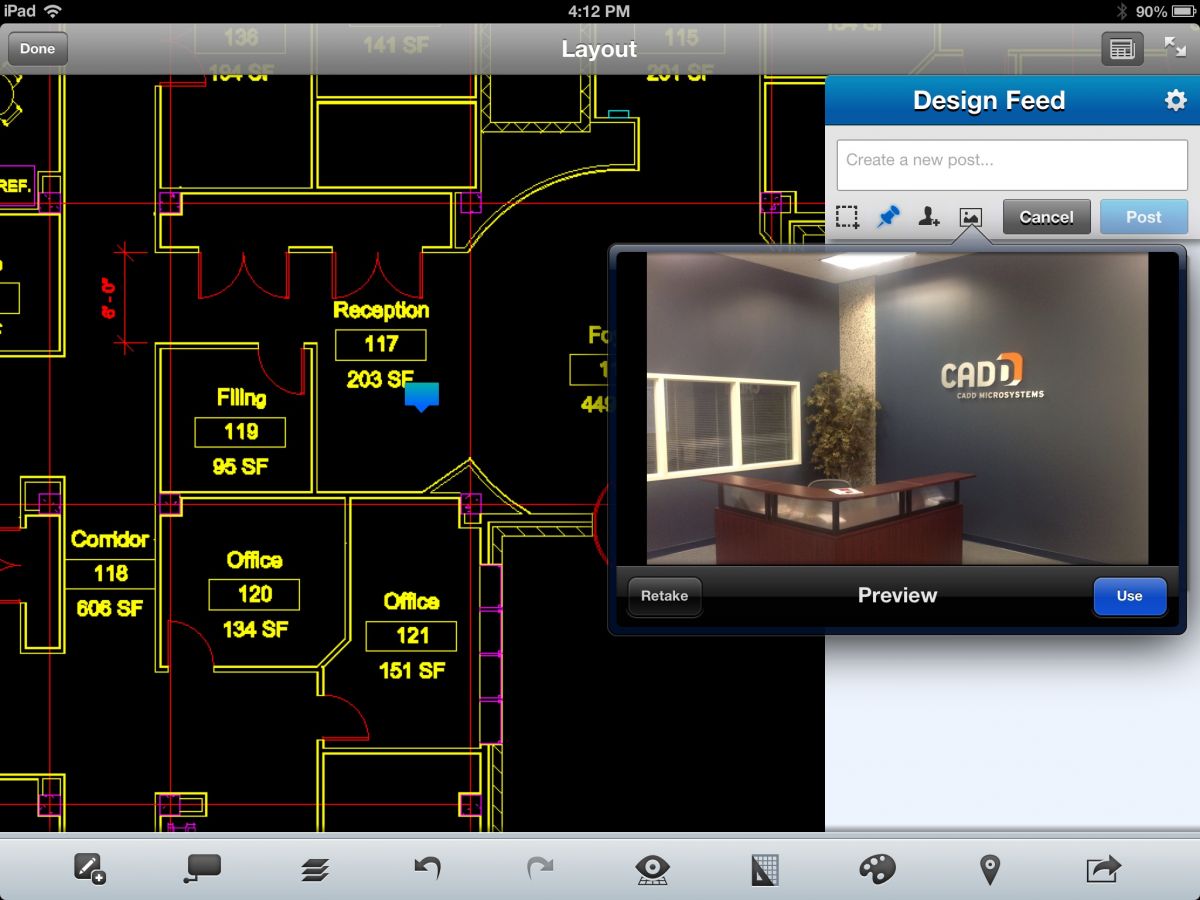
AutoCAD WS capturing a photo using Design Feed

AutoCAD WS not only allows you to take 2D and 3D DWG files into the field, it also provides the ability to edit drawings and collaborate on your designs. When drawings are saved to Autodesk 360 from AutoCAD 2013, support files such as plot style tables are also uploaded. This means you can plot revised versions of your drawings to PDF, DWF, or HP ePrint & Share enabled plotters from the field using the correct plot style tables.

The Design Feed offers a new way to collaborate on your designs. Especially useful for field visits is the ability to associate a photo with a point in your drawing file. Both the point and photo are synced to Autodesk 360, and made part of your DWG file. Need to collaborate with a third-party consultant? Just share the DWG with Autodesk 360, and they'll gain access to everything they need.

Download

Autodesk 360 Infrastructure Modeler
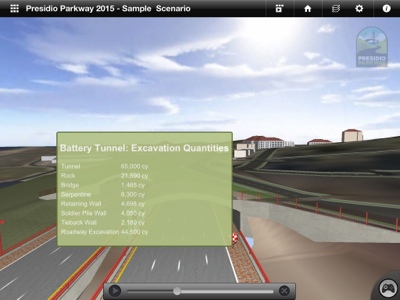
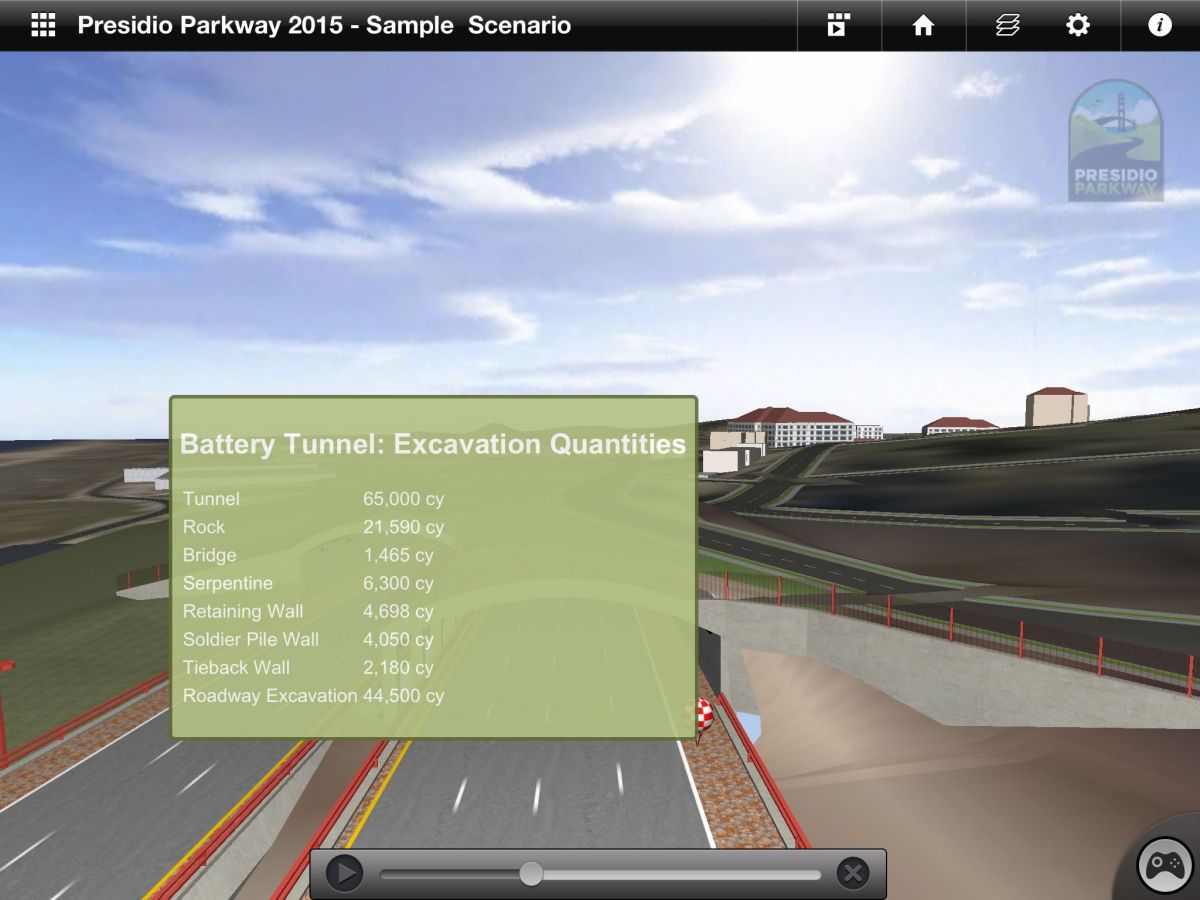
Autodesk Infrastructure Modeler Mobile Application

Autodesk Infrastructure Modeler is a new product that's offered as part of the Premium and Ultimate versions of the Autodesk Infrastructure Design Suite, and Ultimate version of the Autodesk Building Design Suite. With it you can take easily obtained GIS information, and combine it along with your designs created in products like AutoCAD Civil 3D and Revit to communicate what could be (proposed design) in the context of what is (existing conditions).

Paired with Autodesk 360, Infrastructure Modeler allows you to share models as small as a project site, or as large as an entire city with the public and key stakeholders. With the mobile application, models can be taken into the field, and it's augmented reality feature used to superimpose your proposed design atop a live preview from your devices camera.

Download

Autodesk FormIt
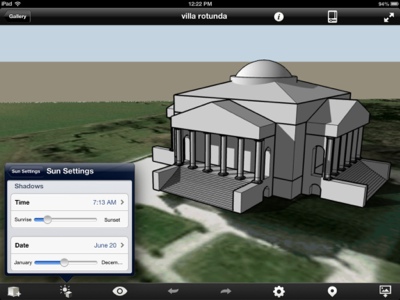
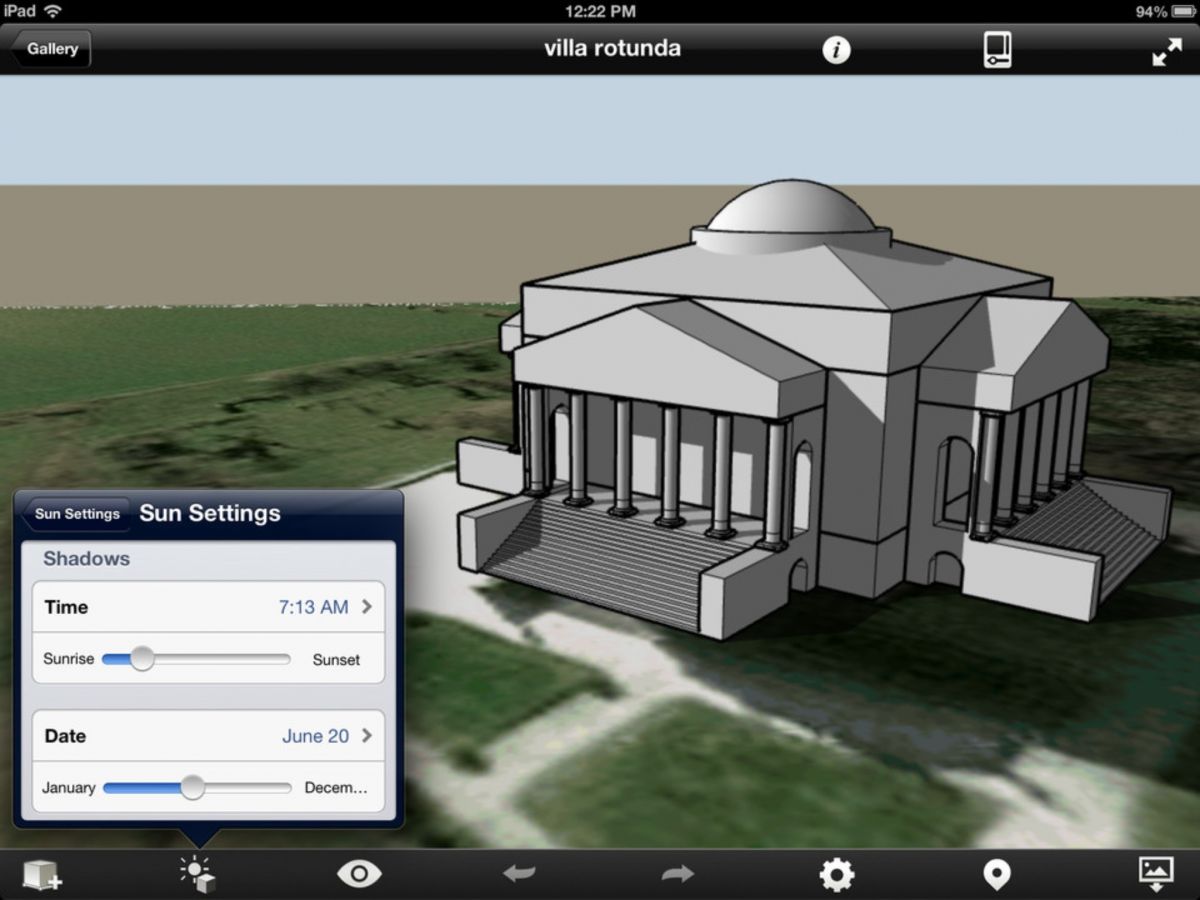
Autodesk FormIt Application

Using Autodesk FormIt you can capture and explore building design concepts using a whole range of shapes. Once placed, you can further refine the size and shape of the objects in your model using multi-touch gestures. Letting you better understand how your idea might perform, you can geolocate your model, and perform preliminary analysis such as shadow studies.

The application writes to the RVT and SAT file formats, and also syncs with the Autodesk 360 service. This means you don't have to (although you can) plug your mobile device into your computer to get your designs to your desktop applications like Autodesk Revit. Simply sync to Autodesk 360 and your designs are available on your desktop.

Download

Autodesk 360

Each of the applications mentioned above are free to download, and integrate with Autodesk 360. If you do not already have an Autodesk 360 account, you can create one for free by visiting http://360.autodesk.com. With a free Autodesk 360 account you gain access to a baseline portfolio of Autodesk 360 services. These services are dramatically expanded for Autodesk Subscription customers who, in addition to more storage space, also gain access to more services. Join us for an upcoming "Benefits of Being An Autodesk Subscription Customer Webinar" to learn more about the Autodesk Subscription program. Read more about Taking your designs into the field with Autodesk 360

Tags: 
Autodesk Subscription, Autodesk 360, AutoCAD WS, Autodesk FormIt, Autodesk Infrastructure Modeler

Build Revit Toposurfaces from AutoCAD Civil 3D Surfaces

Toposurfaces play an important role in many Autodesk Revit models, yet with topography typically coming from a civil engineer using AutoCAD Civil 3D this has oftentimes proven easier said than done. The Autodesk Subscription Extensions for Autodesk Revit 2013 introduce a wide range of new tools to Revit. Among the tools within this extension is a road and terrain tool that aims to simplify the workflow for bringing AutoCAD Civil 3D surfaces into a Revit model.

Autodesk Revit Extensions Ribbon Tab

Once installed a whole range of new tools are added to an Extensions tab within Revit. With this extension installed, AutoCAD Civil 3D surfaces can be imported into Revit using the following workflow:

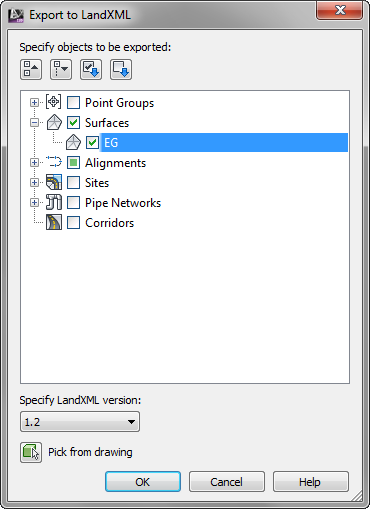
  1. From AutoCAD Civil 3D, export your surface as a LandXML file from the Export panel of the Output Ribbon tab. This opens the Export to LandXML dialog where you can select which Civil 3D objects should be included in the export.
    Export to LandXML
     
  2. Switching to Revit, launch the Roads and Terrain command from the Autodesk Revit Extensions panel on the Extensions Ribbon tab. This opens the Roads and Terrain definition dialog.
     
  3. Uncheck the "Import road segments" checkbox, and then click the Browse button found in the middle of the Roads and Terrain definition dialog, and browse to the LandXML file created with AutoCAD Civil 3D.
     
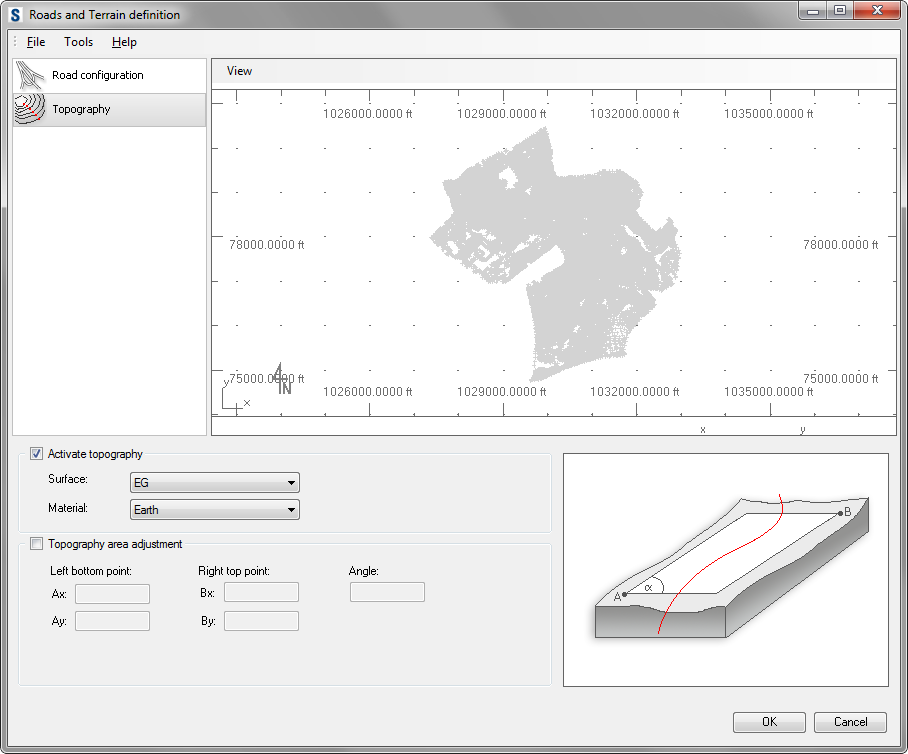
  4. Switch to the Topography page within the Roads and Terrain definition dialog, and do the following:
    Roads and Terrain definition
    • Verify the Activate topography checkbox is selected.
    • Select the desired surface (usually named EG or Existing Ground for existing, and FG or Finished Ground for proposed).
    • Select the desired Revit Material (i.e. Earth or Terrain).
    • Click OK when finished to close the dialog and begin the import.

The time to complete the import process will vary based on the size and complexity of the selected surface (usually under a minute). Once compete you will have a Revit Toposurface that was created directly from the surface found inside AutoCAD Civil 3D.

Since this was created from the actual surface definition instead of a topographic approximation of the surface, the net result is a higher fidelity Toposurface which is more accurate.

The Revit Extensions for Autodesk Revit 2013 are available as a free download from the Downloads > Product Enhancements page within the Autodesk Subscription Center. Read more about Build Revit Toposurfaces from AutoCAD Civil 3D Surfaces

Category: 
Tags: 
Autodesk Subscription, Subscription Extensions

AutoCAD WS Updated to Support AutoCAD Civil 3D Drawings

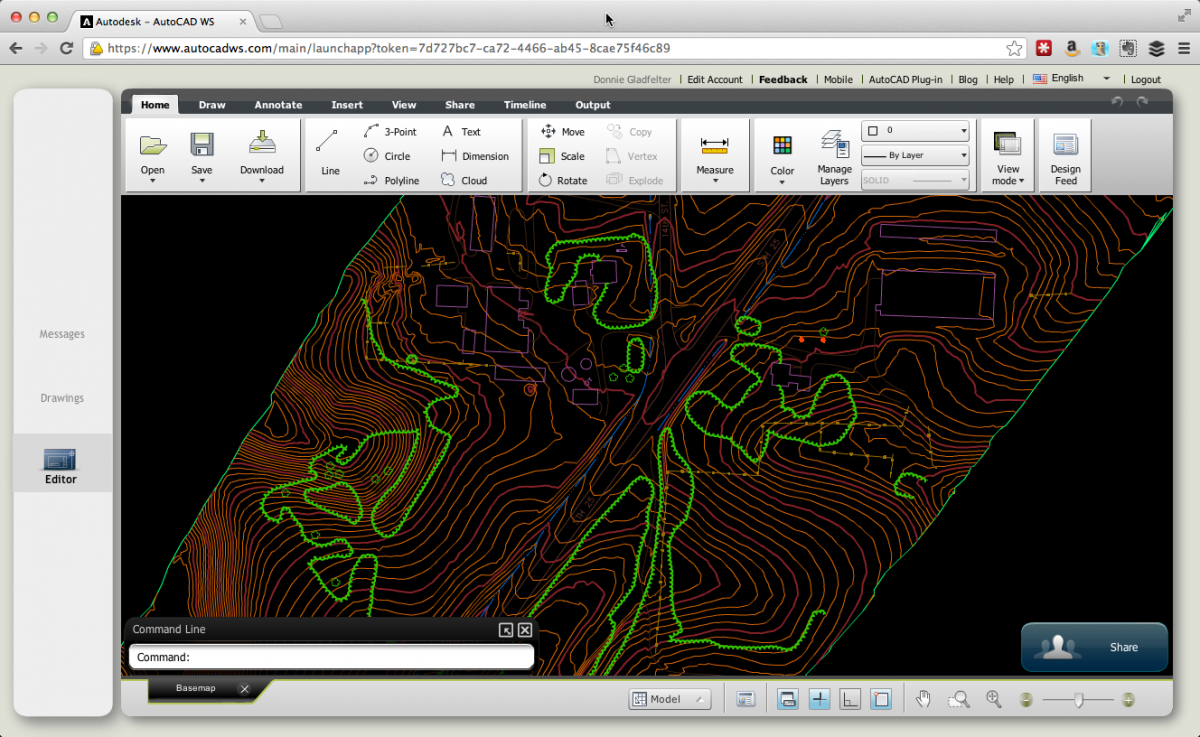
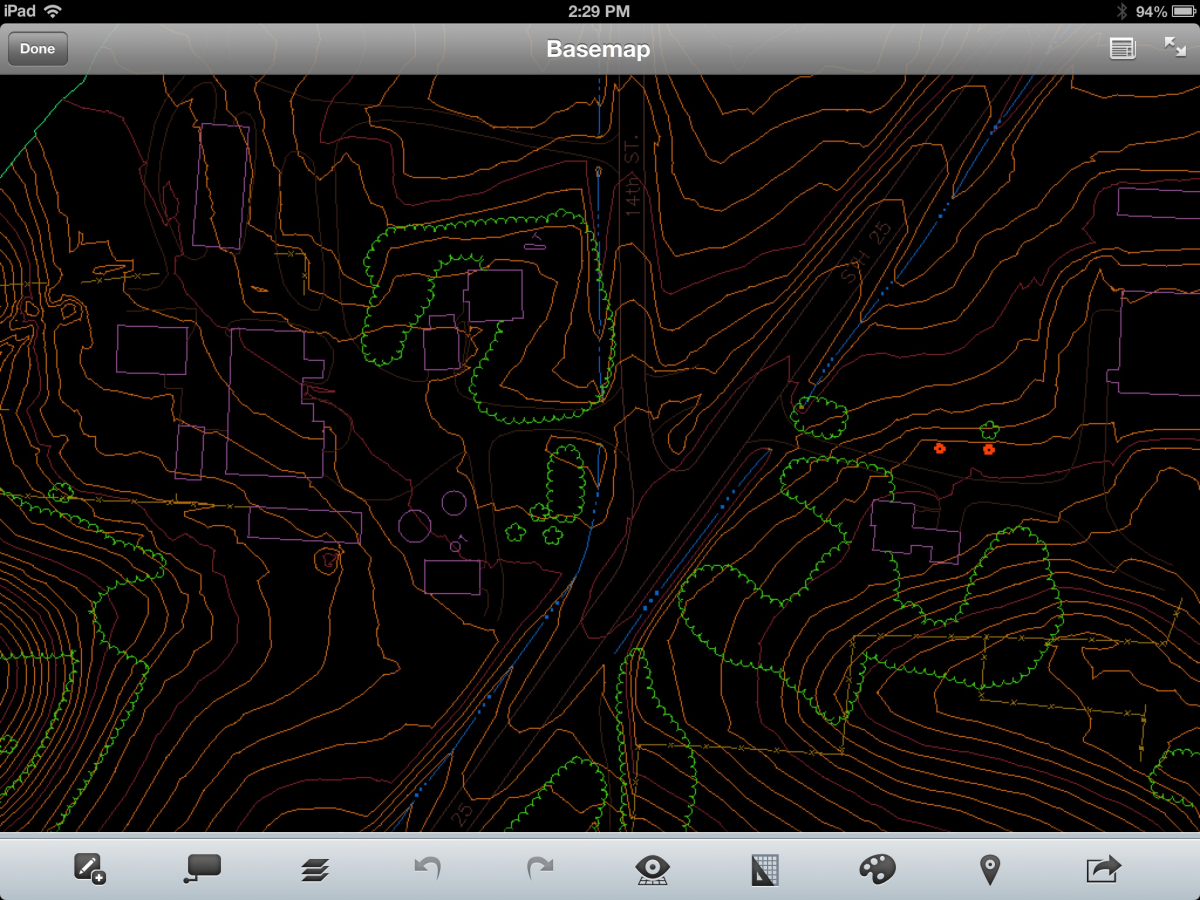
As part of the Autodesk 360 family of products and services, AutoCAD WS is an incredible tool that literally allows you to take your drawings anywhere. Directly integrated with the desktop versions of AutoCAD; you can open, share, and edit your drawings through a web browser, on iOS or Android phones and tablets, and even through a native Mac application.

Despite this expansive landscape of options, there was one sizable limitation to AutoCAD WS for Civil & Infrastructure customers. That limitation was simply the fact AutoCAD Civil 3D drawings had to be converted to "vanilla" AutoCAD drawings (lines, arcs, & polylines) to be used inside AutoCAD WS.

Earlier today, Autodesk updated the entire AutoCAD WS platform, and eliminated that restriction across all versions of AutoCAD WS; web, mobile, and even the Mac platform. This is especially exciting for a number of reasons, but this update seems especially helpful for those who want to take their designs with them into the field. The Android and iOS versions of AutoCAD WS can utilize the GPS receiver within cellular devices, letting you track your location within the context of your drawing. Although not as accurate as a survey-grade GPS, the location-based interaction with your designs stands to be an invaluable tool during your next site visit.

AutoCAD WS, Autodesk 360, & Autodesk Subscription

AutoCAD WS is part of the broad set of features, cloud services, and cloud-enabled products that define Autodesk 360. Autodesk Subscription customers gain access to a larger breadth of services including more storage and computing capacity.

Learn More About Subscription

AutoCAD WS Blog: AutoCAD Civil 3D Drawings Now Supported on AutoCAD WS Read more about AutoCAD WS Updated to Support AutoCAD Civil 3D Drawings

Category: 
Tags: 
Autodesk 360, Autodesk Subscription, AutoCAD WS, AutoCAD Civil 3D

Vaulting Workshared Revit Models

Autodesk Vault Collaboration AEC is a powerful data management solution specifically designed for design and engineering workgroups. Initially born to sustain Autodesk Inventor and AutoCAD workflows, the 2013 release expands this reach to enable "vaulting" Revit models with worksharing enabled.

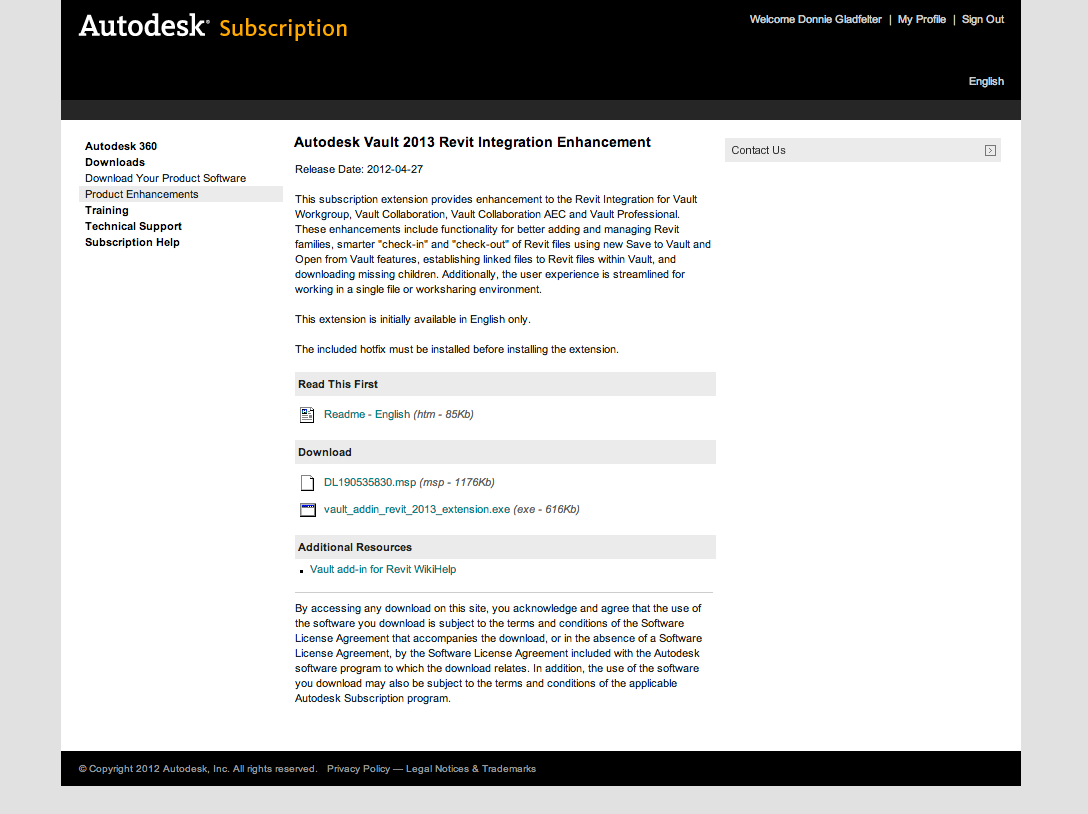
Autodesk Vault 2013 Revit Integration Enhancement

Out of the box, the integration between Autodesk Revit 2013 and Autodesk Vault 2013 remains entirely file-based. That is, you go to the Vault to check out a file, and return to check it back in. To bridge this gap, and make it possible to open a "vaulted" Revit model as a Central File, Autodesk has released an Autodesk Subscription Enhancement.

You can find the "Autodesk Vault 2013 Revit Integration Enhancement" download by logging into your Autodesk Subscription Account, and navigating to Downloads > Product Enhancements. In addition to the enhancement itself, you'll need to install a hotfix before the Vault/Revit Extension will let you proceed with its installation.

Neither the necessary hotfix (DL190535830), or the Vault/Revit Extension are available outside the Autodesk Subscription site. For this reason, be sure to download both from the Subscription Center "Autodesk Vault 2013 Revit Integration Enhancement" page. Once downloaded, installation is pretty straightforward. The important thing to remember is hotfix (DL190535830) must be installed before the extension itself can be installed.

Vaulting your Revit Model

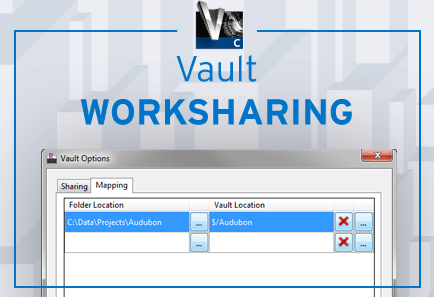
The great news about vaulting a Revit model is that it doesn’t require you to work much, if at all, differently than you do now. That’s to say, the relationship between Central and Local files will remain intact. What Vault does is simply integrate with your existing Central file, monitoring it for changes. This link between Vault and your Central file is established through a Mapping function of the aforementioned Vault/Revit extension. To establish this link between Vault and Revit:

  1. Switch to the Vault tab inside Revit, and Log In if you haven’t already. It’s important to note that while all users can utilize Vault Mappings, only Administrators can create them. Therefore, only Administrators will be able to create the Mapping outlined below.

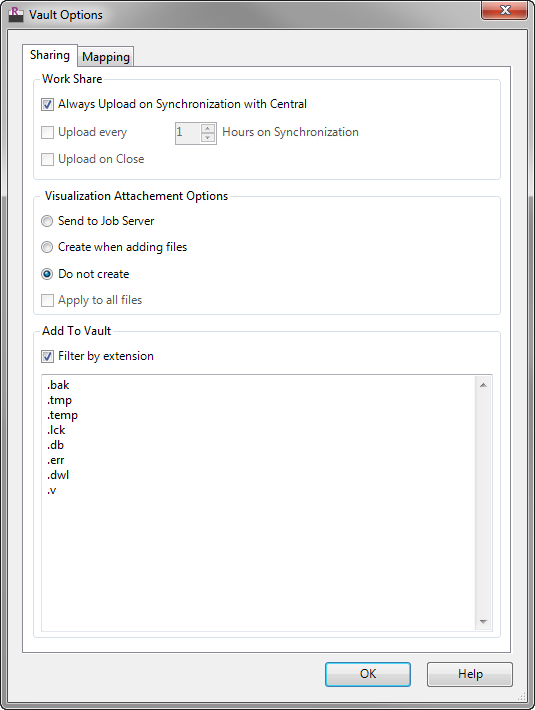
  2. Click the Options button on the Vault Ribbon, and choose Always Upload on Synchronization with Central on the Sharing tab of the Vault Options dialog.

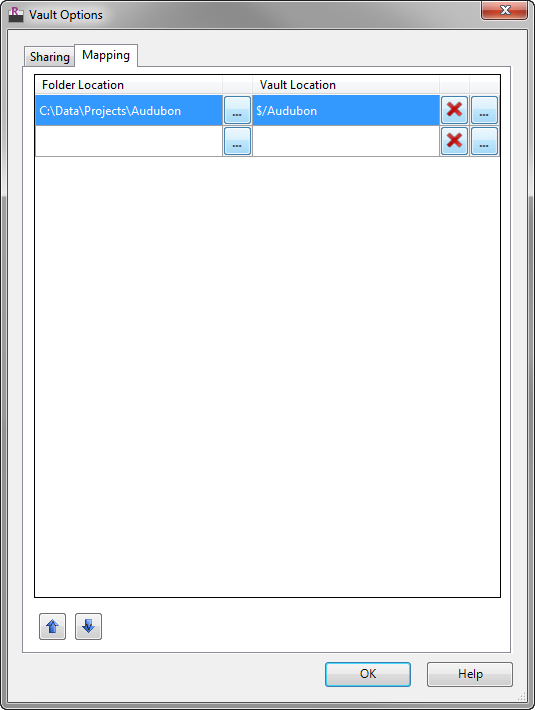
  3. Switch to the Mapping tab of the Vault Options dialog; select the project directory that contains your Central file on the left, and the corresponding Vault project on the right.

    Notice, while this procedure will still work if you select the Model directory, Vault is smart enough to track down your model within the overall Project directory. Thus, although my directory structure is such that each discipline is in its own Model directory, this Mapping configuration will work for any model throughout the project.

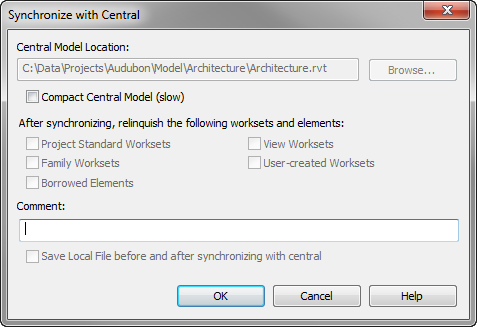
  4. Synchronize with Central after creating the Vault Mapping. This will open the Synchronize with Central dialog where you can click OK to both Sync and Vault your Revit model.


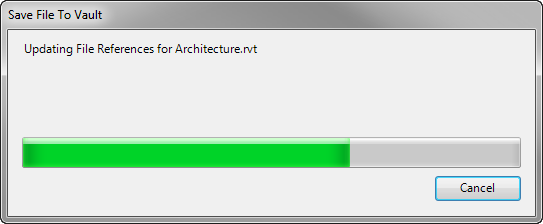
    After synchronizing with Central, Revit will also Vault your Revit model.

Visit our Autodesk Vault product page to learn more about Vault, or to contact us about exploring ways Vault could help your project team. Read more about Vaulting Workshared Revit Models

Tags: 
Autodesk Subscription, Worksharing